Mekkit University 047 Floating Water
Hey everyone!
DOGS has again given a great writeup, this time on how to get water to float above the surface! Normally, water would be confined to the ground, with dirt on the sides. Using this method, you will be able to hover water above the ground as well as see through the sides. It is great for making aquariums and water towers!
DOG'S Floating Water Tutorial

Water is a beautiful-yet-challenging feature to work with in OpenRCT. Because water tiles behave in a manner similar to terrain, you will often find yourself having to limit your waterworks to ground-level constructions, or ones that strategically hide the brown vertical faces of the raised water tile. In this tutorial, I will teach you a trick that prevents the brown faces from rendering, which will allow you to create bodies of water on raised platforms that reveal the area underneath, as well as how to create map edges that look like transparent water.
Phase 1: Process and mentality for floating water
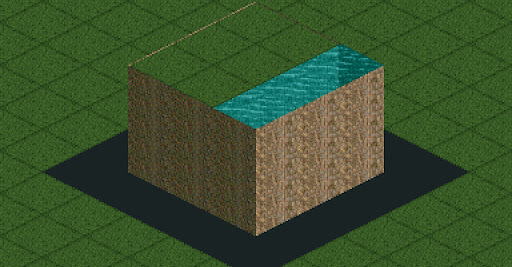
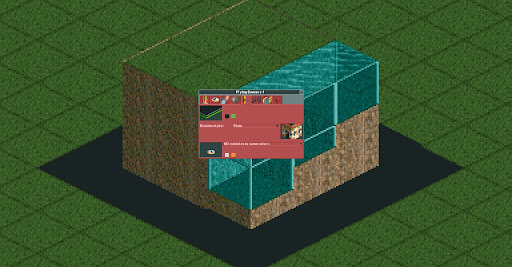
I am going to demonstrate floating water with a simple 1x1 water tower structure. If I try to raise a 1x1 tile of water to the desired height inside the tower, you can see the brown vertical faces that interrupt our desired effect.
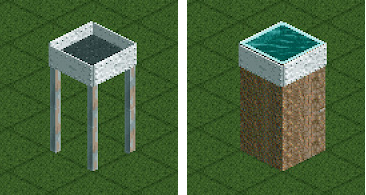
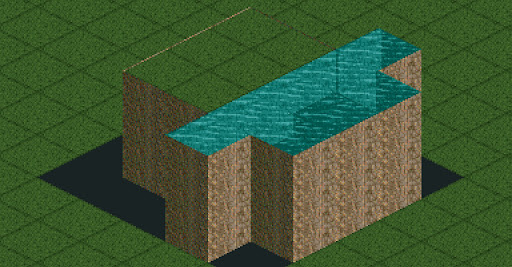
What we need to do is trick the game into not bothering to render those vertical faces, but how? The game only needs to render faces on the tiles the game believes to be on the edge of the body of water, so what we can do is modify the size of the body of water so that the area we want visible is actually fully buffered inside a barrier of additional water tiles raised to the same elevation.
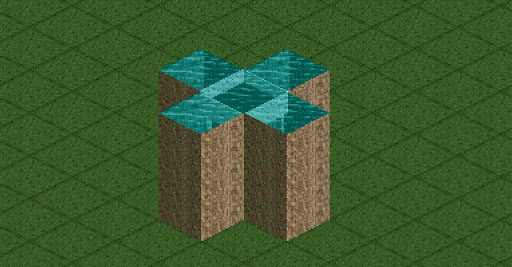
Now that we have added these water tiles, the four edges associated with the original 1x1 area are transparent! The only water feature rendered inside the center tile is the blue rhombus of the water’s surface - all the terrain edges have been assigned to tiles unrelated to our 1x1.
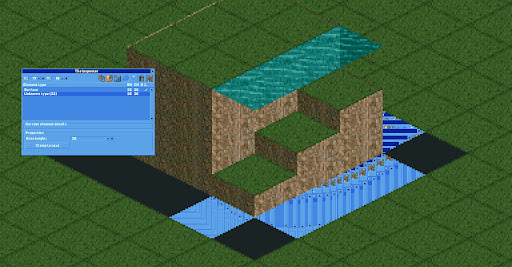
In order to return the body of water to the original 1x1 area, we will open the Tile Inspector tool and place a corrupt element under the Surface element of these additional water tiles. This will un-render the land tile and whatever water was associated with it. The missing surface will create a bizarre smearing effect caused by the game not having any sprites to render at that coordinate. I am smearing my blue Tile Inspector window over these areas in order to make my images less obscure.
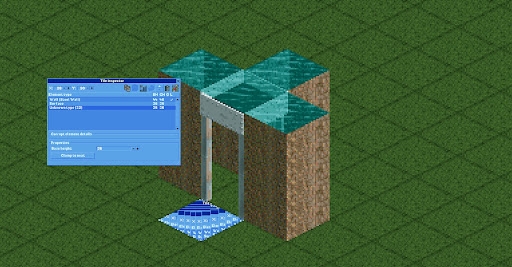
Do this for every additional water tile you raised around the perimeter of your intended area.
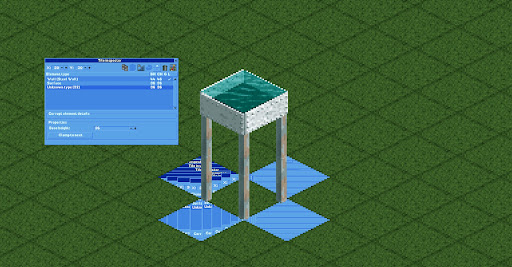
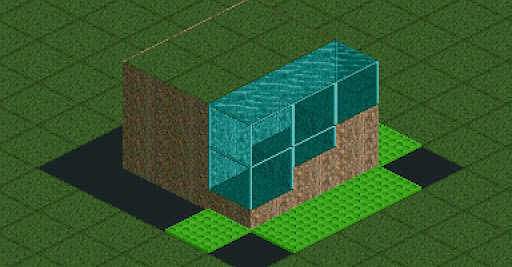
With the terrain edges hidden, you can now see the intended effect of creating a raised 1x1 area of water. In order to hide the smearing effect on the surrounding tiles you will need to create a mock surface with either scenery blocks or path tiles. You know what I’m going to choose:
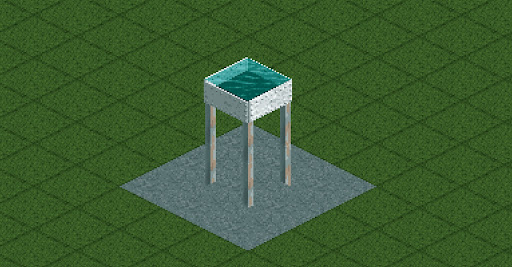
DOGS TOWN is now one step closer to running water.
Phase 2: Process and mentality for transparent water on map edges
The process for creating transparent water on the edge of the map is similar to the above method, but requires an additional trick and a few considerations in planning. First, you MUST make sure that your map edge has a buffer of at least one row of tiles that has been dropped to zero elevation in order to perform this trick. It is recommended that you have a “black tile” palette installed in order to color the lowered tiles the same black as the game’s background.
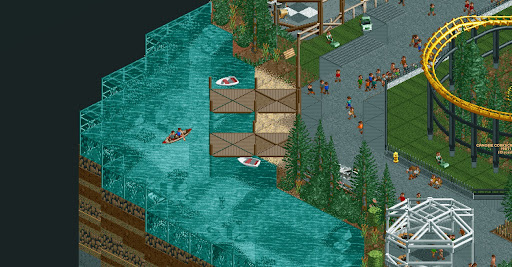
Here I am simulating a 5x5 map that has been reduced to 3x3 through blacktiling. The goal is to hide the land edges associated with the water while still maintaining the blacktile effect of the surrounding perimeter.
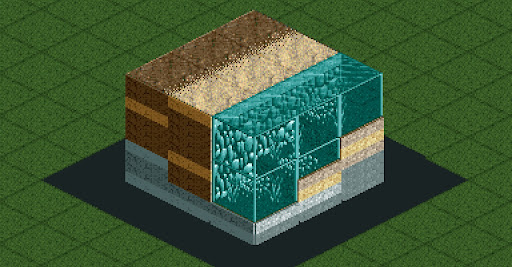
Just like before, the first step is to raise water tiles around the edges of the intended area in order to un-render the brown faces on those tiles. We will then do the same corrupt element technique with the Tile Inspector to turn those additional water tiles invisible.
I am also going to add a few glass panes right now in order to make the intended result less obscure as we continue the process.

Because the surface tiles around the perimeter are gone, we can’t simply blacktile the surface! You could try an abstract technique of framing that involves scenery items, but I want to maintain the illusion that the blacktile border is intact so nobody bats an eye over the trickery involved.
Luckily, since the blacktile palette applies to scenery and track as well, we have other means to hide the smearing. I have chosen to use tiles from the Flying Saucers ride, but it is also possible to blacktile with other tracks such as Hedge Maze. We simply create a Flying Saucers ride and copy-paste a tile from the center of the ride over each of our hidden surface tiles. Mine is green for demonstration purposes.
Then it’s just as easy as coloring the ride blacktile color and decorating the terrain to your taste. You will have lots and lots of visibility to play with so make sure to go nuts!
This technique requires a degree of planning ahead in order to work well. I suggest practicing on an empty map until you are comfortable corrupting surface tiles and have some experience so you can more reliably visualize your intended result. Hands-on learning is the best thing I can suggest, so I invite you to try this for yourself and get some dirt under your nails. Good luck - and make sure to share your results on the DKMP discord server!
-DOGS