Mekkit University 043 BOATS
Hey everyone!
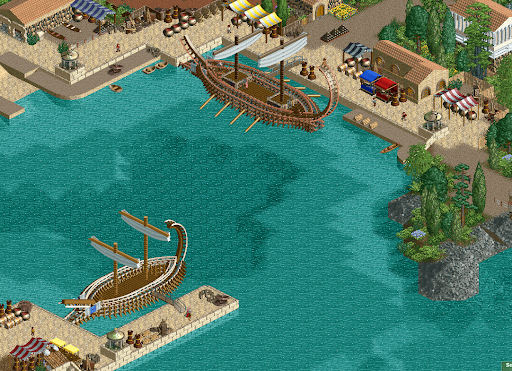
Mekkit University welcomes Mamarillas as a "guest professor" for today! He loves making boats in RCT and he's thought a lot about how to approach it. This map and doc are a summary of what he's learned!
BOATS by Mamarillas
The most important consideration when building boats in RCT is width. Boats that are an even number of tiles wide have an edge as their centerline; boats with an odd number of tiles have a full tile as their centerline. The width also determines what hull shapes (contours) are possible.
In an odd-width boat, we can place full tile objects along the centerline. This allows for trackitecture masts/smokestacks using observation tower, roto drop, etc. We can also build single-tile structures on the centerline.
3 Tiles wide: allows for 1-tile cabin in center and small trackitecture bowsprit
In an even-width boat, we can place walls, fences, and poles along the centerline. This allows for masts made from poles as well as keels or bowsprits made from fences.
4 Tiles wide: allows for corner posts as masts, fence objects as bowsprit
HULL CONTOURS
We can achieve the most natural looking boat hulls by using track pieces and having slightly different shapes for each layer of height. However, only certain bow and stern shapes are possible at a given tile width.
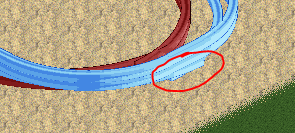
Many of the track pieces overlap rather than joining up cleanly. We can use the tile inspector to trim away the overhanging bits of each curve. There are two options: delete that part or hide that part with a corrupt element. Deleting gives a cleaner final result because there are no corrupt elements to manage (for example if you want to demolish the boat). Hiding makes the boat easier to adjust, since all the pieces remain intact and re-buildable. For this map I have chosen to delete the parts since you can see the un-trimmed curves.
The accompanying map shows all these possibilities from two to eight tiles wide. If you see a Cool Dude that means the shape requires no trimming.
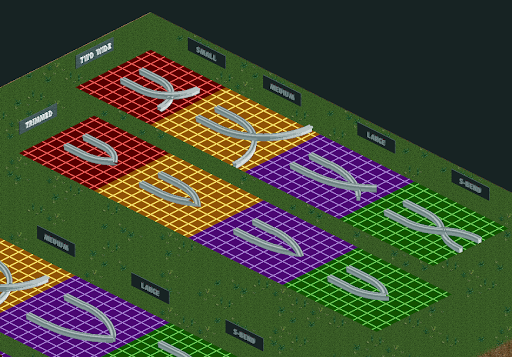
Curves available for small boats two tiles wide.
We can taper the layers nicely by using gentler curves or by changing the length one tile. The length is up to your own aesthetic preference (I usually use double or triple the width but hey some folks like thicc boats).
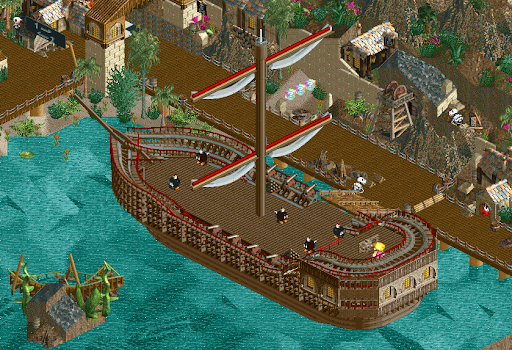
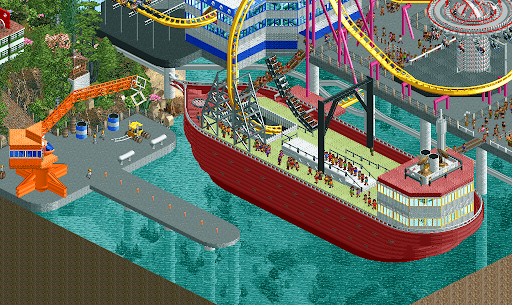
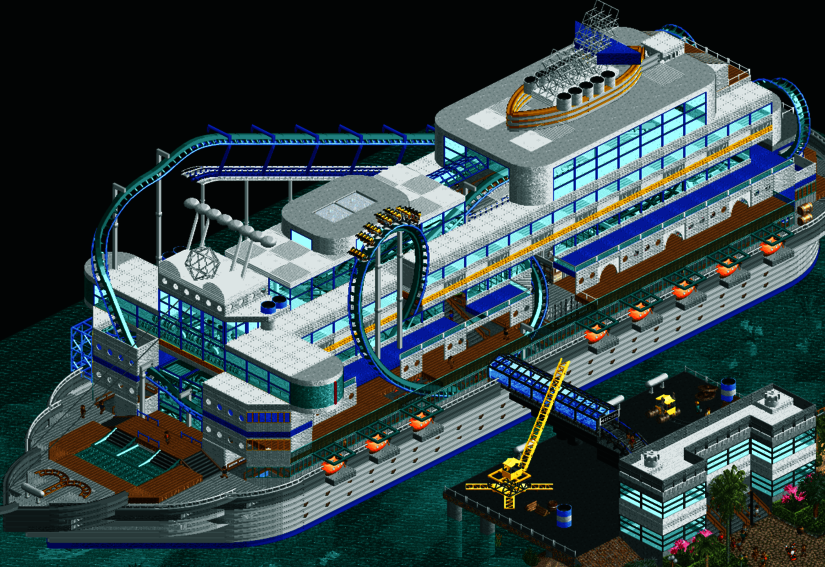
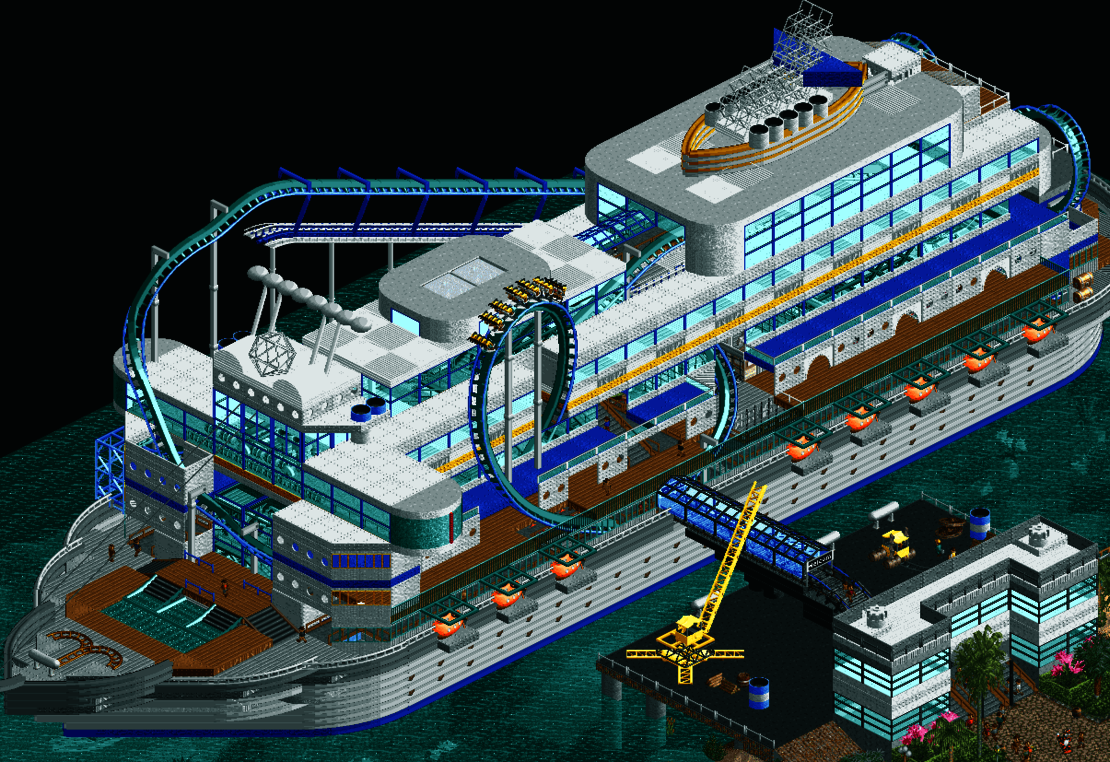
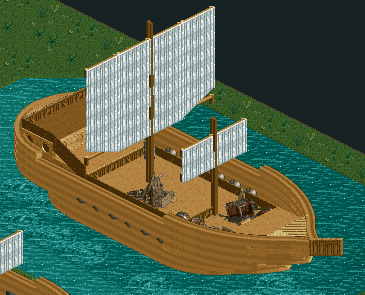
EXAMPLE BOAT
INSTRUCTIONS
Two Tiles Wide
- Bottom layer = two straight pieces for each side and small curves for the bow
- Trim the frontmost two tiles
- Second layer = two straight pieces for each side and S-bends for the bow
- Trim the front four tiles
- Fill in the centerline with walls or fences
- Add more scenery or trackitecture to fit the theme
Three Tiles Wide
- Bottom layer = straight pieces for each side, medium curves for the bow, S-bends for the stern
- Trim the frontmost two tiles and next two center tiles. Paste in a side piece and rotate it for the stern
- Second layer = same shape as bottom layer (repeat steps 1-2)
- Third layer = large curves for the bow, S-bends for the stern
- Trim the two back center tiles
- Fill in the centerline with blocks
- Add one or two more layers of steeplechase or other track for railing or bulwarks
- Add more scenery or trackitecture to fit the theme
Four Tiles Wide
- Bottom layer = small curves for the bow and stern
- Second layer = medium curves for the bow, small curves for the stern
- Trim the frontmost two tiles
- Third layer = large curves for the bow, extend by one tile with small curves for the stern
- Trim the six indicated tiles at the front
- Fourth layer = large curves bending outward for the bow, small curves for the stern
- Trim the front four tiles
- Fifth layer = same as the fourth layer (repeat steps 6-7) but remove some of the straight side pieces
- Sixth layer = same as the fifth layer but with more straight pieces removed and slightly less of the front trimmed
- Fill the hull with blocks and add sloped fence for the bowsprit
- Replace flat piece near stern with sloped piece
- Add more scenery or trackitecture to fit the theme
Five Tiles Wide
- Bottom layer = large curves for the bow, small curves and a straight piece for the stern
- Trim the frontmost three tiles
- Second layer = same as the bottom layer (repeat steps 1-2)
- Third layer = large curves and diagonal straights for the bow, extend by one tile with small curves and a straight piece for the stern
- Fourth layer = same as the third layer (repeat step 4)
- Fifth layer = large curves in different directions for the bow, small curves and a straight piece for the stern
- Trim the frontmost tile
- Sixth layer = another layer of large curves bending outward for the bow with some straight and sloped pieces for the bowsprit
- Fill the hull with blocks
- Seventh layer = railing or bulwarks of sloped wood coaster or other track with large curves at the bow and small curves at the stern
- Add more scenery or trackitecture to fit the theme
Six Tiles Wide
- Bottom layer = medium curves for the bow and stern
- Second layer = same as the bottom layer (repeat step 1)
- Third layer = large curves bending outward for the bow, extend by one tile with medium curves for the stern
- Trim the frontmost two tiles
- Fourth layer = same as the third (repeat steps 3-4)
- Fifth layer = large curves + diagonal straight sections + same direction large curves for the bow, extend by one tile with small curves and a straight piece for the stern
- Trim the frontmost two tiles and next two center tiles
- Sixth layer = same as the fifth (repeat steps 6-7)
- Seventh layer = large curves + diagonal straight sections + different direction large curves for the bow, small curves and a straight piece for the stern
- Trim the front square of four tiles
- Fill the hull with blocks and add more scenery or trackitecture to fit the theme
Seven Tiles Wide
- Bottom layer = large curves overlapping 1 tile for the bow and stern
- Second layer = same as the bottom
- Third layer = large curves + straight diagonal + sloped diagonal for bow, extend by one with large curves for the stern. Extend the ends with small curves to smooth over this bump that you would otherwise get:
- Fourth layer = same as the third (repeat step 3)
- Fifth layer = same except no sloping on the front diagonal bow pieces
- Sixth layer = copy front large curves and diagonals only
- Fill in the hull with blocks and cargo support structure
- Add more scenery or trackitecture to fit the theme
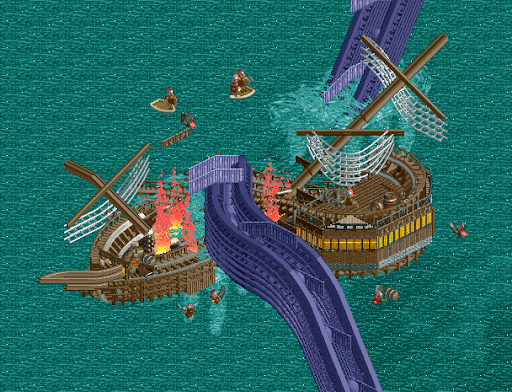
BONUS BOATS