
Mekkit University 041 Visual Studio Setup for Vehicle Hacking
Hey everyone!
This is a written guide for setting up hacking, since just getting started can be daunting. A big thank you to Spacek for his detailed twitch video guide to the actual hacking, linked both at the beginning and at the end of this doc. Set aside a couple hours to work through the whole set up process, and ask for help in the Discord server if you get stuck!
Visual Studio Setup for Vehicle Hacking
Introduction
Use this guide to set up a version of the OpenRCT2 code in Microsoft Visual Studios 2019 before “hacking” trains to have unusual properties and mixed car types. Once you have Visual Studios set up with the code, SpaceK’s hacking video shows how to perform the actual hacking in detail and explores some interesting applications: https://m.twitch.tv/videos/213625054
Setup VS
1. Visual Studios Installer may already be on your Windows computer. Launch it and choose to
install Visual Studios Community 2019. If you have not used VS in a long while, you may need
to update to the latest version, again by using the Installer.
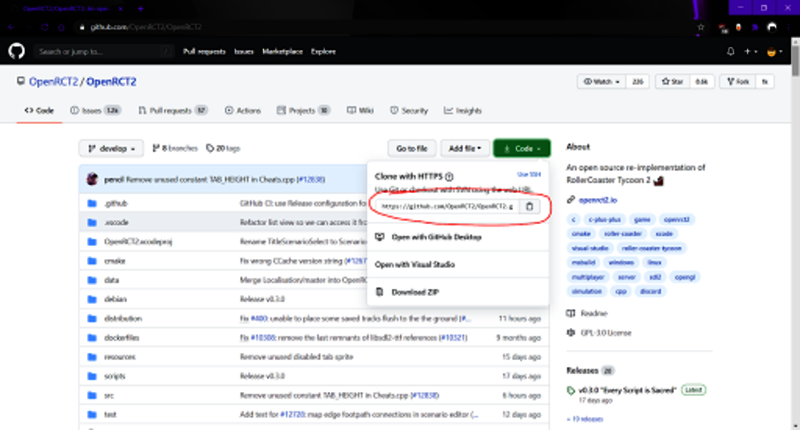
2. Grab the game’s code from the OpenRCT2 Github webpage. Copy this link to the clipboard:
github.com/OpenRCT2/OpenRCT2.git
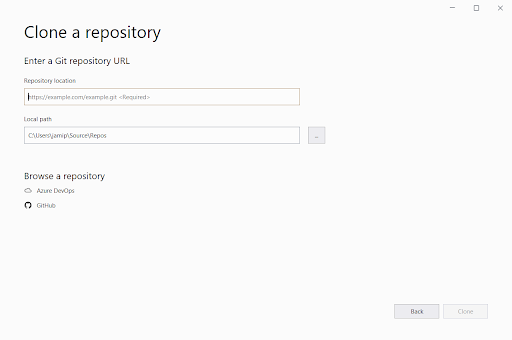
3. Open VS and hit “Clone Repository.” Paste the link from Github here and note the “Local path”
where the files will be stored in case you need to find them again.
4. Hit the Win key, search and open up the Developer Command Prompt for VS 2019.
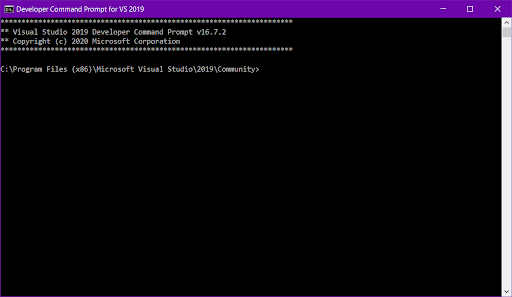
5. Into the Dev Cmd Prompt window, type:
cd C:\Users\USERNAME\Source\Repos\OpenRCT2
(this is the Local path we just saw when pasting the Github link into VS)
Next type:
msbuild openrct2.proj /t:build /p:platform=x64
(This should take some time to set itself up, be patient, crack open a cold one, and maybe close
other applications on your computer to save resources)
Lastly, run the debug game for the first time with:
bin\openrct2
6. Close the game again as we have some edits to make to the code now. This is the only time we
need to run the game via command prompt. Every time after this, we will run the game from
inside VS.
To access the code again in VS next time either:
a.) Navigate in Windows Explorer to C:\Users\USERNAME\Source\Repos\OpenRCT2\openrct2.sln
and right click to open with Microsoft Visual Studios 2019
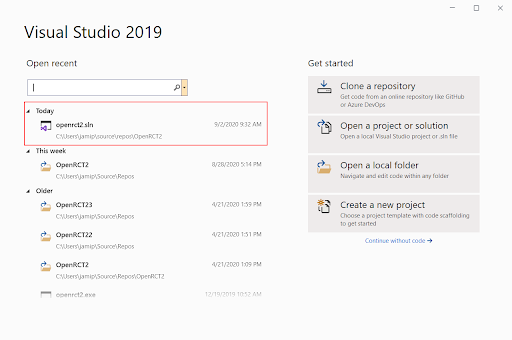
b.) Or simply launch VS and under the Recent list, find and open openrct2.sln
Edit Code
1. Now, to navigate to the important code. In Solution Explorer window (right), navigate to and
open ride.cpp:
libopenrct2 > ride > ride.cpp

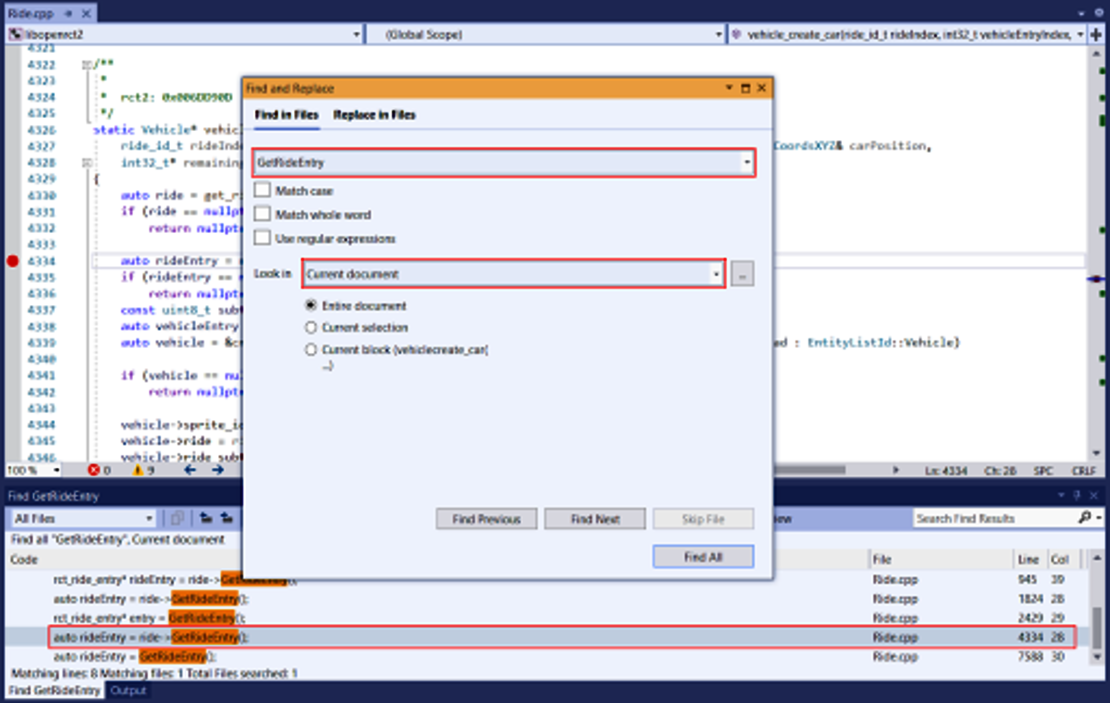
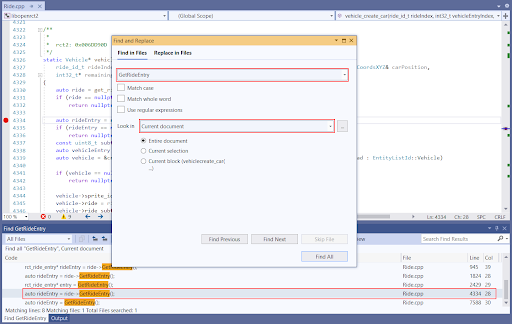
2. Hit Ctrl+Shift+F to bring up the search window and search “GetRideEntry”, looking in
“Current Directory”
(The line we want to jump to should be somewhere in the lower 4000’s)
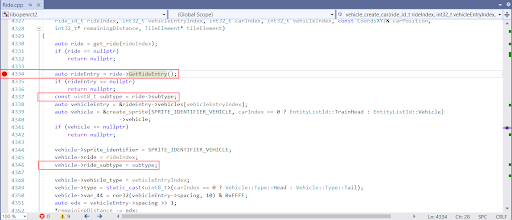
3. Edit these three lines in Ride.cpp (note that the line numbers may be different for your version
of the code) to match what’s shown here:
a.) First line just needs a breakpoint set. Left click just to the left of the line number.
b.) Second line should be blank, so copy paste this in:
const uint8_t subtype = ride->subtype;
c.) Third line needs to be editing to be:
vehicle->ride_subtype = subtype;
4. Run the debug game again, this time and every time in future by selecting x64 from
the dropdown up top, and then hitting the “Local Windows Debugger” button.

Hacking Tutorial
Now with everything set up, SpaceK’s video explains how to do the actual hacking magic:
https://m.twitch.tv/videos/213625054
Mixing Trains Recap
(Be sure to watch Spacek’s video first and use this recap as a quick reference for future)
- Run the game in Debug from VS (Local Windows Debugger button)
- Test a ride with the train type you want to use. The breakpoint in VS should trigger and the Locals window will show all the different values and attributes of the trains being
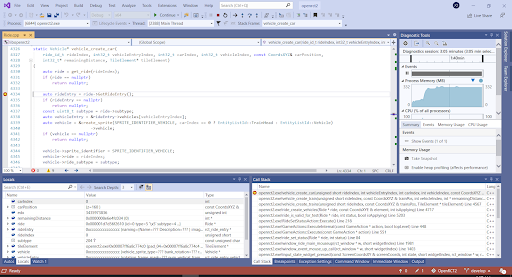
3. Observe the carIndex number. This is the position of the car being spawned in and starts at 0,
counting up. No need to write these numbers down.
4. Take note of the ride > subtype number (there may be some weird ‘x3’ or something
following the number, but the normal looking number without the quotes is all that
matters to us.) This is the train type (e.g. wooden 4 seater train) being spawned in.
5. Take note of the vehicleEntryIndex number. This denotes which kind of car is spawning
in (e.g. front car, middle car, back car) and for most trains, will start at 0 and increase
to 1 or 2 as each car spawns in one at a time.
6. Change the ride > subtype and vehicleEntryIndex numbers at will.
7. Hit F5 to continue on to the next car and change your numbers again at will. Once all the
cars are spawned in, hit F5 one more time to resume the game and see the results of your
hacking.